

Dust Bunny Costume Guide
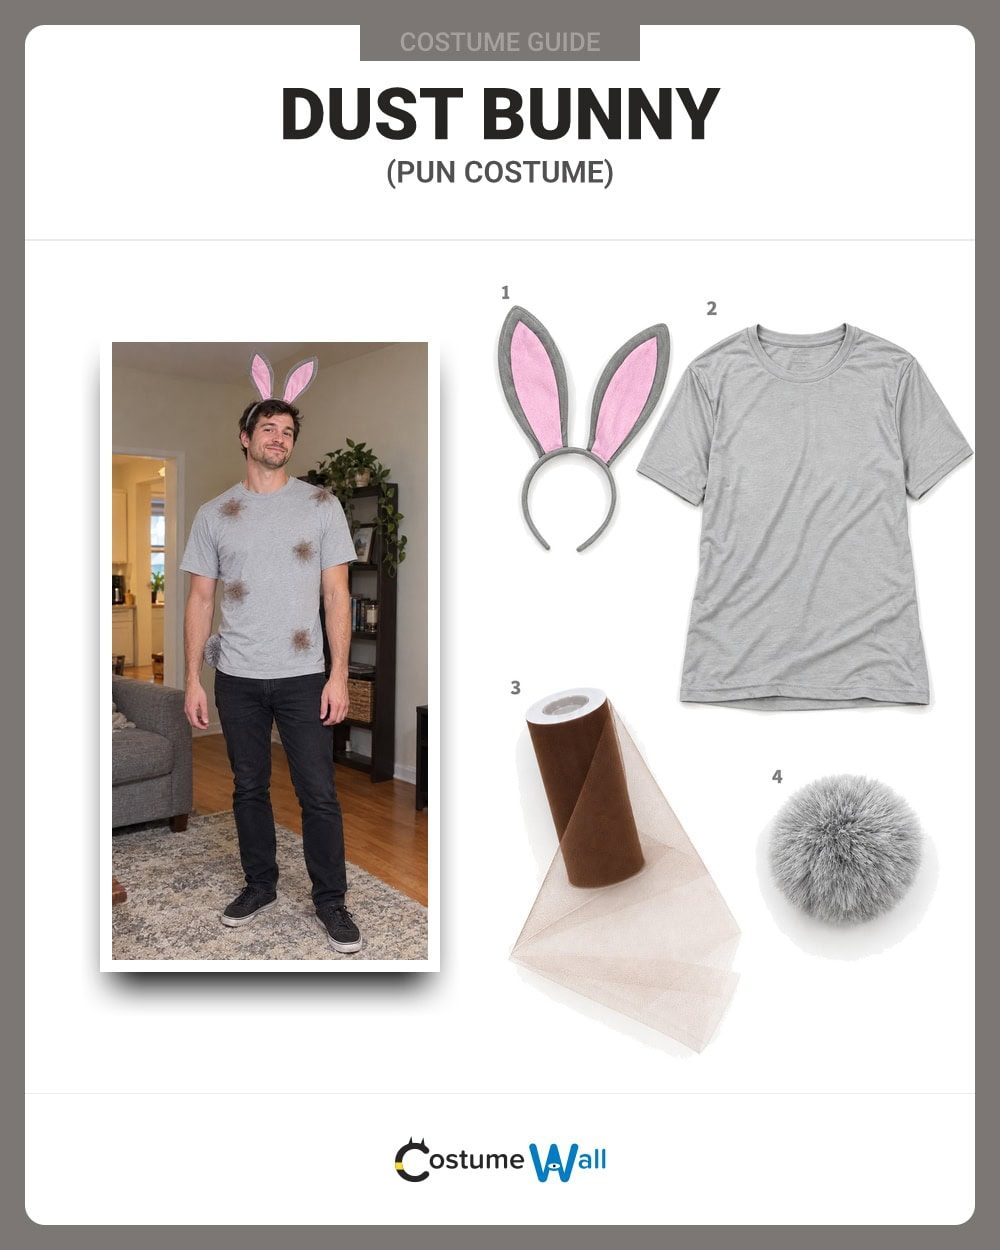
DIY Costume Items
How to Make a Dust Bunny Costume
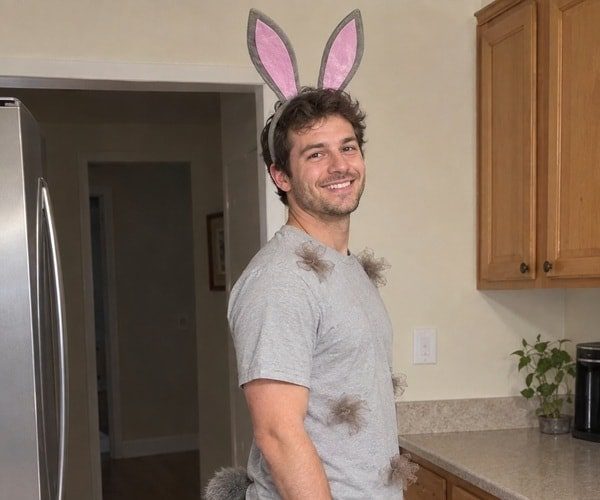
Dust Bunny is a goofy household-expression pun brought to life as a tiny gray rabbit with a very dusty problem. It is funny because the costume takes an ordinary phrase and makes it instantly readable. You get bunny ears, a fluffy tail, and a few brown dust wisps instead of a full animal suit. Basically, you are part rabbit, part cleaning reminder. What more could a Halloween outfit ask for?
To build the look, start with the gray bunny ears headband and a heathered gray training tee. Add the rabbit tail pom pom in back, then attach a few small brown tulle wisps to the shirt or tail area. Keep the dust details light and scruffy. Brown ribbon is the key craft supply here, and you do not need a giant tulle skirt or a mountain of fluff. The finished outfit should look like a bunny that escaped from under the couch, not a parade float.
ProjectFour step-by-step instructions
TechniqueGather, stitch and accessorize
What You’ll Need
From the Kit
Bunny ears, a heathered gray training tee, a rabbit tail pom-pom and brown tulle ribbon. The ribbon creates the dusty visual cue; the ears and tail do the bunny work.
From Home
Scissors for cutting short ribbon pieces, a needle and thread for a few loose hand stitches, and a small table so the ribbon stays clean while you work. Attach the bundles before wearing the tee, then remove the stitches before washing.
Make a few small dust bundles.
Tie short lengths of brown tulle at their centers before attaching them. Two or three wisps near the hem or tail suggest collected dust without covering the gray shirt. Keep the bunny ears clean and upright so the animal remains the first thing people recognize.
Choose removable stitches.
Use a few loose hand stitches through each bundle center and the front shirt layer while the shirt is off your body. Leave the stitches accessible so you can remove the tulle before laundering. Never use actual dust or loose powder to create the effect.
Make Your Dust Bunny Costume
Lay everything out before getting dressed. Keep the ribbon pieces short and sparse so the finished look stays wearable rather than becoming a bulky fringe.
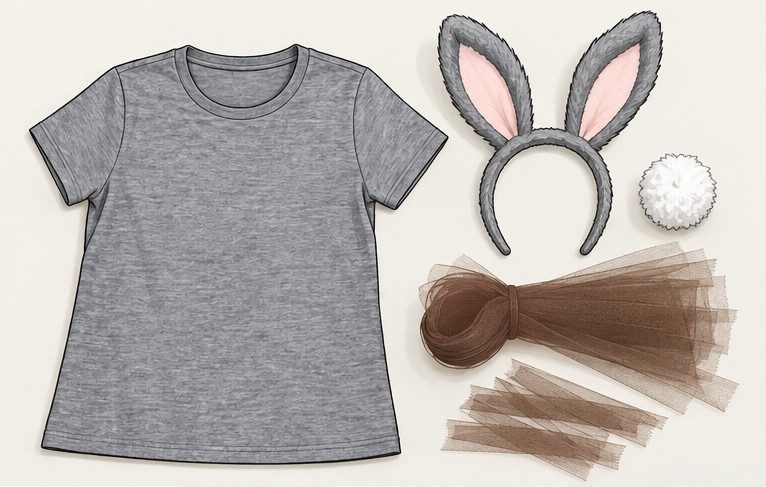
1. Lay Out the Gray Base
Place the heathered gray training tee on a table with the bunny ears, rabbit tail pom-pom and brown tulle ribbon. Cut three or four hand-length ribbon strips, gather each at its center and tie the centers into two or three small bundles; short pieces create texture without turning into a snagging fringe.
Plan the bundles near the lower hem or tail area, leaving the gray shirt visible. This puts the “dust” where someone might imagine it collecting under furniture while keeping the rabbit details easy to recognize.
Check: The bundles are lightweight, the cut edges are not long enough to reach your feet, and every attachment point is accessible on the unworn tee.
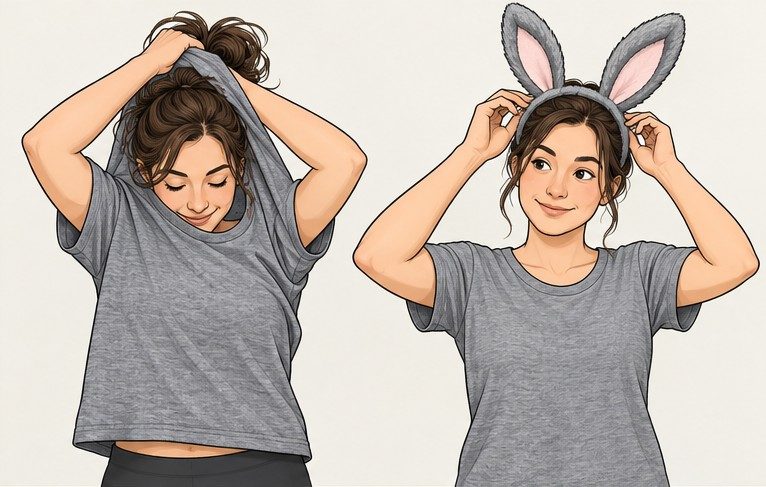
2. Put On the Bunny Base
Put on the gray tee and place the bunny ears headband comfortably. Adjust the ears so they sit upright and visible without pressing behind your ears or narrowing your view.
Keep the neckline and shoulders clear. If you want one extra wisp, reserve it for a sleeve edge rather than adding weight around the face; the gray shirt and ears should remain an unmistakable rabbit base.
Check: Turn your head, raise your arms and sit once. The ears remain in place and the shirt does not pull at the planned dust locations.
3. Add the Tail and Dust Wisps
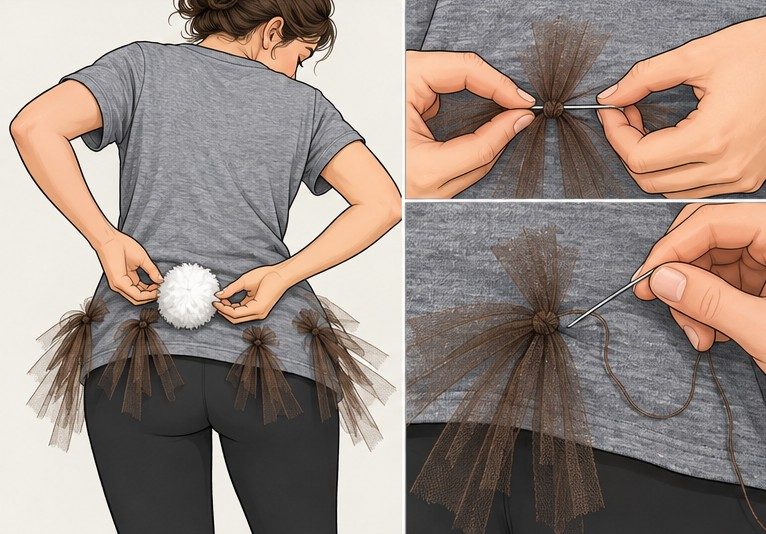
Take the tee off after the fit check and attach the rabbit tail pom-pom with its intended fastening. On the unworn tee, place each tied bundle near the lower hem or tail area and sew two or three loose stitches through the bundle center and the front layer only; knot the thread on the inside without catching the back layer.
Use the stitches to hold the visual detail, not to stiffen the whole shirt. Leave the neckline, shoulders and tail attachment clear, remove the stitches before washing, then put the tee back on before the movement check. Never substitute loose dust, powder or an irritant for the brown ribbon.
Check: Gently tug each bundle, put the tee back on and walk a few steps; it stays attached, the tail remains visible, and no ribbon edge reaches your hands or feet.
4. Check the Finished Dust Bunny
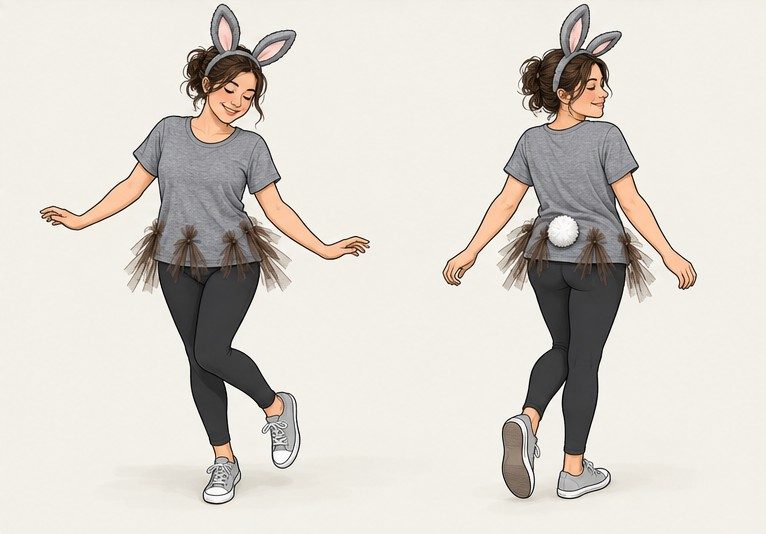
Look at the outfit from the front, side and back. The ears, gray tee and tail should identify the rabbit first; the sparse brown bundles should be the second read that turns it into a Dust Bunny.
Walk, sit, bend and lift your arms. Trim or remove a bundle if it catches on furniture, feels scratchy or makes one side of the shirt hang lower. A smaller dust cue is clearer than a heavy fringe.
Check: The bunny silhouette stays balanced, the brown details are easy to spot, and every attachment is comfortable for ordinary movement.
Quick Fixes
The dust effect is hard to see.
Use a few slightly larger brown tulle wisps near the hem or tail, leaving the gray shirt visible. The joke needs a hint of dust, not a full skirt of fringe.
The tail keeps shifting.
Reposition its intended fastening at a stable waistband or shirt area. Check it after sitting, and do not let the pom-pom hang low enough to drag.
The ears feel loose.
Adjust the headband before adding ribbon. Keep the ears comfortable and visible; the pun is less clear if you spend the night holding them in place.
You want a simpler version.
Wear the gray tee with the ears and tail alone, then add only two or three brown ribbon wisps. The color contrast does most of the explanatory work.
Bring the Dust Bunny Out of Hiding
Dust Bunny works because the gray rabbit silhouette is familiar before the brown ribbon details reveal the household-expression joke. Keep the dust wisps sparse so the outfit stays comfortable and easy to move in.
Bring another wordplay costume.
A friend in Smartie Pants makes an easy pun pairing. You do not need matching colors or a shared character universe: each outfit tells its own joke.
When the party is over, remove the ribbon and tail, fold the tee and save the ears for another costume night.
Dust Bunny Costume FAQs
Practical answers about the gray base, removable dust details and comfortable movement.
Wear the heathered gray tee with bunny ears and a rabbit tail pom-pom, then add a few short brown tulle wisps as a light dust effect. The illustrated steps show the order and movement checks.
No. The gray shirt, ears and tail establish the bunny. Keeping the base simple makes the brown dust details easier to read.
Tie the ribbon into small bundles and use a few loose hand stitches through each bundle on an unworn tee. Avoid safety pins while wearing it, and remove the stitches before washing. Keep the ribbon short so nothing snags, drags or makes the shirt heavy.
No. Use clean brown tulle ribbon as the visual stand-in. Do not add loose dirt or powder to clothing or skin.
Use the tail’s intended fastening at a stable waistband or shirt area. Walk and sit before leaving, and keep it off the ground.
Yes. A heathered gray tee or another comfortable gray top can be the base. The ears, tail and small brown accents carry the pun.
Yes. One person can be Dust Bunny while another wears a related household-expression pun. Each costume remains complete on its own.
Yes. The joke is not gender-specific. Choose the gray base, footwear and fastening method that fit you comfortably.
About Dust Bunny
The Dust Bunny character, while based on a pun, has a whimsical and charming personality. This particular bunny is always in search of dusty corners and forgotten spaces, trying to make friends with other dust bunnies along the way. However, as a Dust Bunny, it’s also prone to causing a little mischief, often leaving a trail of dust wherever it hops.
This unique character is perfect for showcasing your wit and creativity to stand out at any costume events. Just like its real-life counterpart, the Dust Bunny may be overlooked at first glance, but its playful spirit and lovable nature make it a truly memorable character that won’t go unnoticed.