


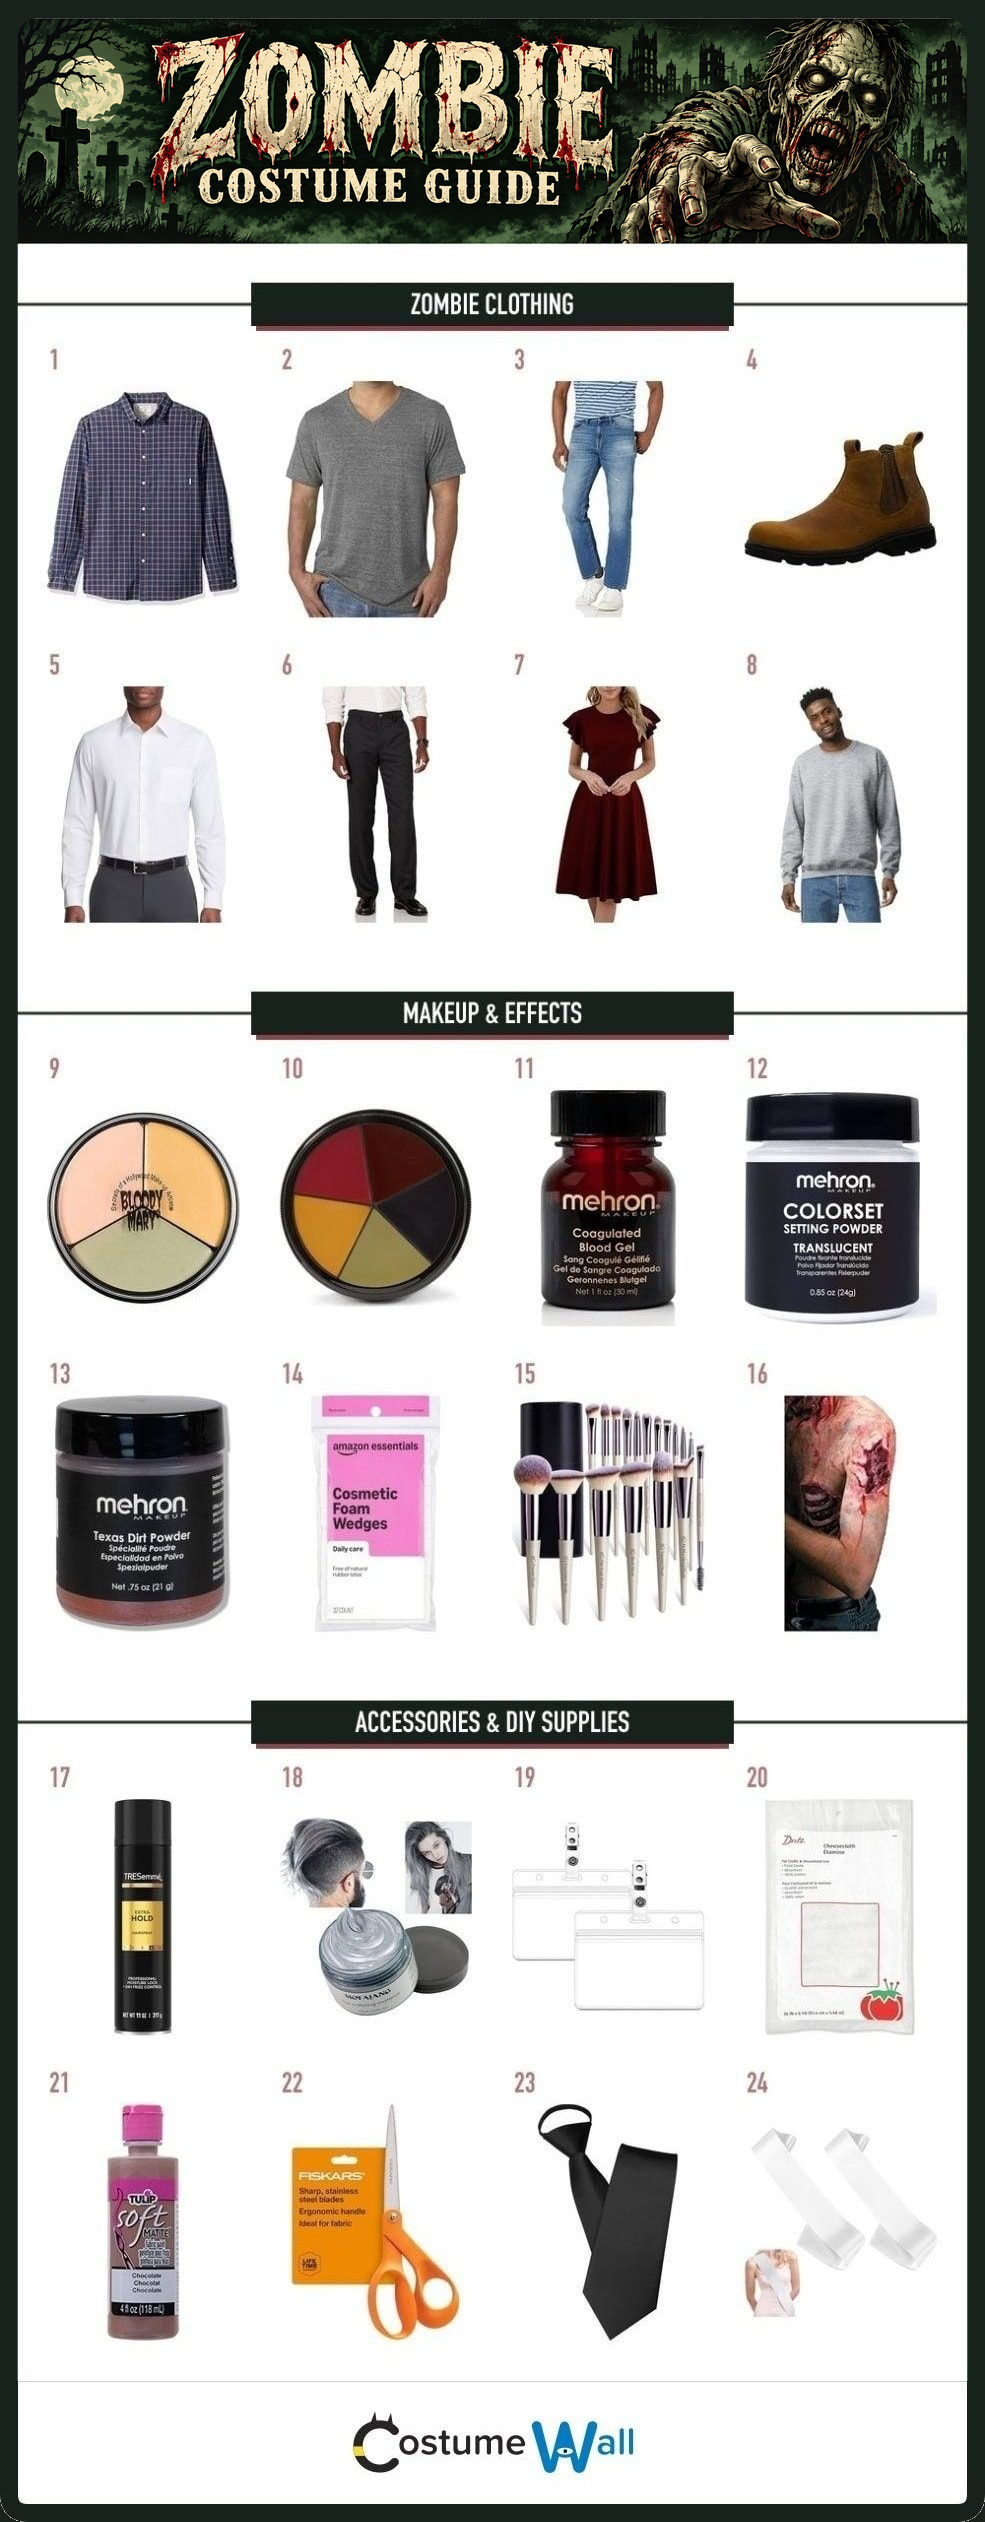
Essential Zombie Items
Zombie Clothing
Use your own clothes where you can.
- Plaid OvershirtSee on Amazon
- Gray T-ShirtSee on Amazon
- Blue JeansSee on Amazon
- Brown Ankle BootsSee on Amazon
- White Button-Down ShirtSee on Amazon
- Black Dress TrousersSee on Amazon
- Burgundy Party DressSee on Amazon
- Gray SweatshirtSee on Amazon
Makeup & Effects
Choose your finish; you do not need every effect.
- Pale Makeup PaletteSee on Amazon
- Bruise Makeup PaletteSee on Amazon
- Cosmetic Fake BloodSee on Amazon
- Translucent Setting PowderSee on Amazon
- Costume Dirt MakeupSee on Amazon
- Makeup SpongesSee on Amazon
- Makeup BrushesSee on Amazon
- Prosthetic Wound KitSee on Amazon
Accessories & DIY Supplies
Optional styling details and tools; use supplies you already own.
- Extra Hold HairspraySee on Amazon
- Gray Hair WaxSee on Amazon
- Clip-On Name BadgeSee on Amazon
- Cotton CheeseclothSee on Amazon
- Brown Fabric PaintSee on Amazon
- Fabric ScissorsSee on Amazon
- Black Pre-Tied TieSee on Amazon
- Blank White Sashes (2-Pack)See on Amazon
How to Dress Like a Zombie
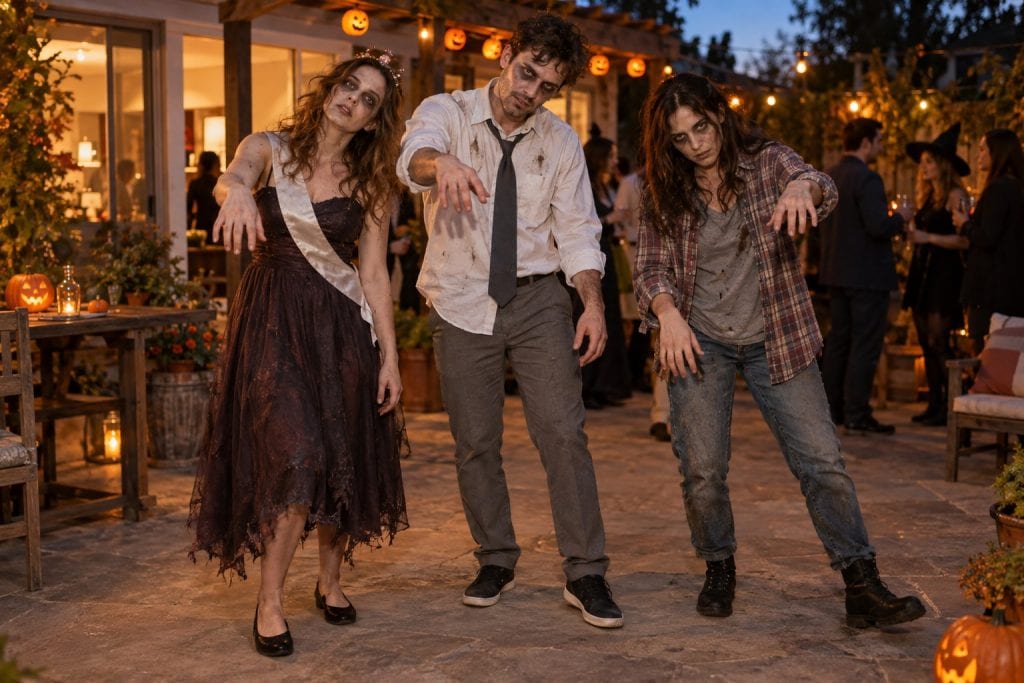
A zombie costume starts with an ordinary outfit that looks like it has survived a very bad night. An open plaid shirt, faded tee, jeans and scuffed boots make an easy Halloween look; a crooked tie and work badge turn the same idea into an undead office worker. For a zombie prom costume, swap the everyday layers for an old dress or suit and add a wilted flower. Choose who your zombie used to be first, and the outfit almost builds itself.
The convincing details are uneven rather than elaborate: one rolled sleeve, an untucked shirt, tousled hair and a little gray-brown cosmetic shading around the cheek hollows. Leave clothes intact for a quick, reusable version, or distress an old outer layer with small tears and dry fabric paint. Fake blood and prosthetic wounds are optional. A pale, tired face and a vacant stare can sell a blood-free zombie just as well.
You do not need all the items above. Start with your own clothes, choose a makeup palette and add one detail that tells your character’s story. Below, you’ll find four outfit ideas, illustrated assembly steps, a makeup tutorial and ways to coordinate a couple or an entire undead group. Prefer a recognizable character? Browse the dedicated zombie guides for a more specific look.
Assembly timeAbout 30 minutes*
BudgetReuse or shop the kit
Works asSolo, duo or group
DIY levelEasy · no sewing
*Estimated dressing and simple makeup time once you have the pieces. Allow extra time for distressing clothes and drying paint. Cost depends on what you already own.
Zombie Character Costumes
Choose a named undead character, from classic film zombies to colorful animated and game interpretations. Each guide follows that character’s specific clothing and makeup.
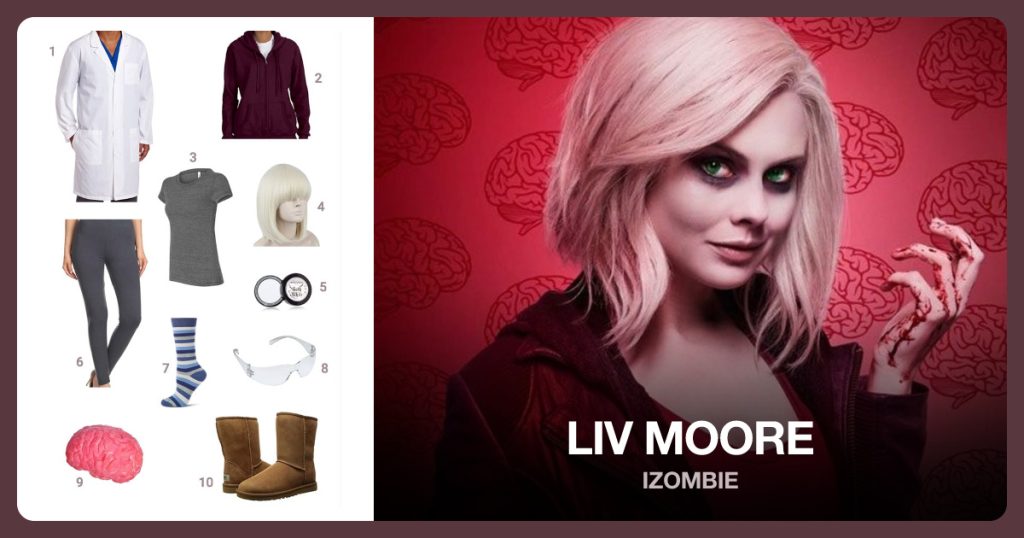
Liv Moore
A pale bob and character-specific clothing create the iZombie look.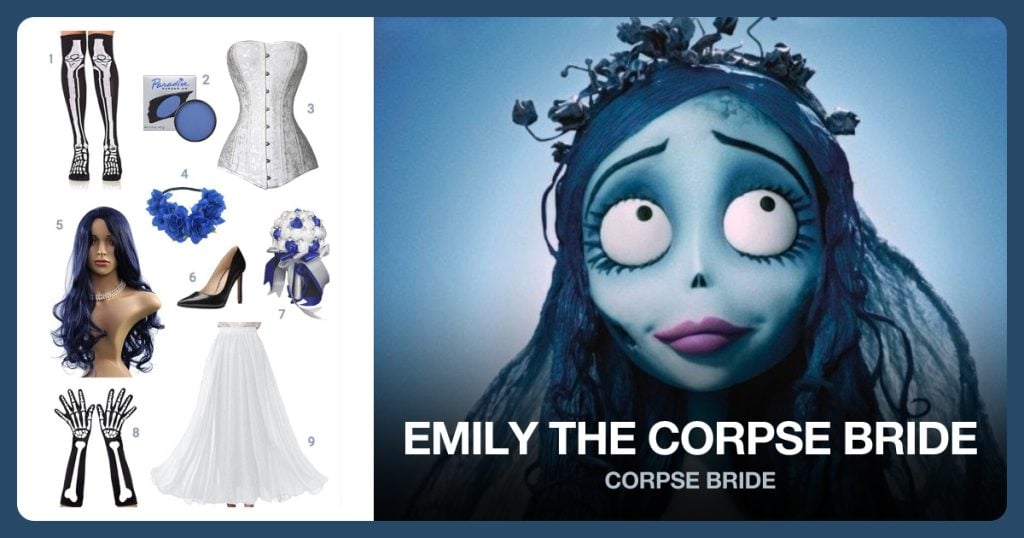
Emily the Corpse Bride
Build a romantic undead look around the blue styling and bridal outfit.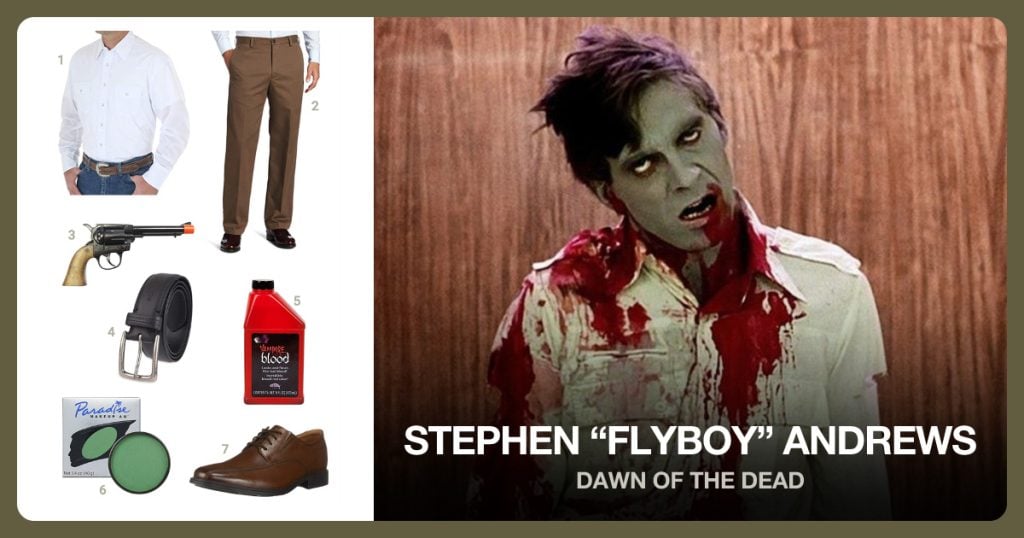
Stephen “Flyboy” Andrews
Use the dedicated Dawn of the Dead guide for a recognizable movie zombie.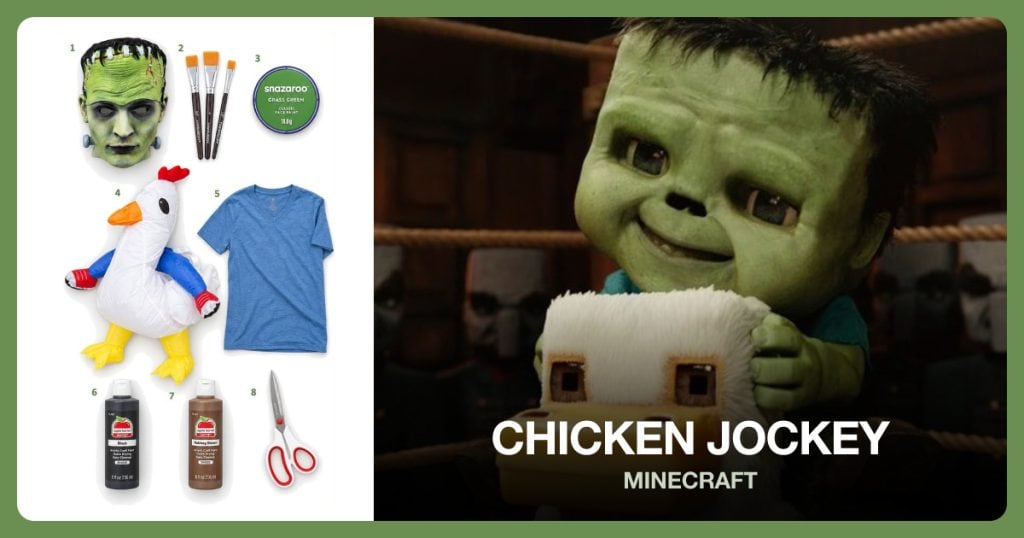
Chicken Jockey
A baby zombie riding a chicken gives the Minecraft version a completely different shape.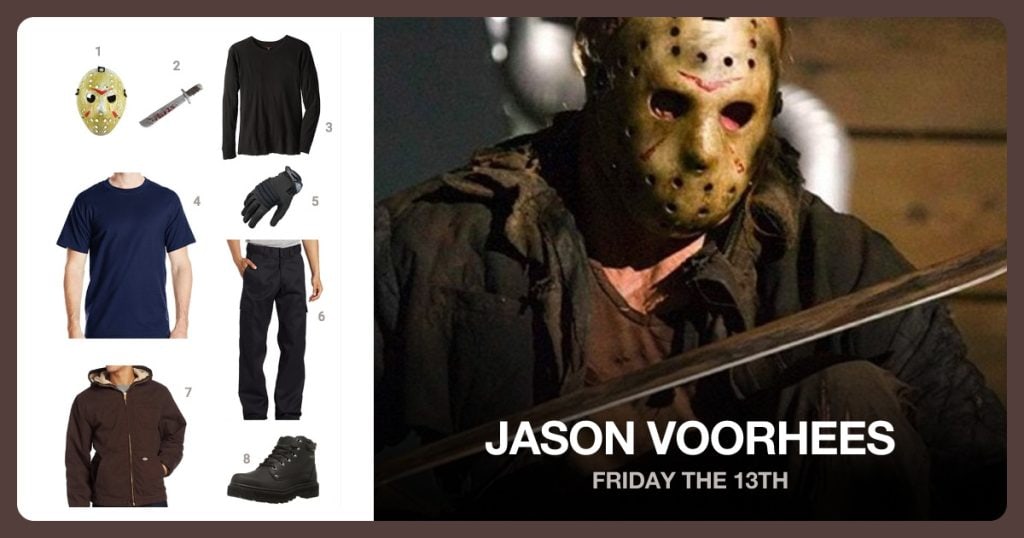
Jason Voorhees
The resurrected Jason brings a hockey mask and weathered workwear to an undead slasher costume.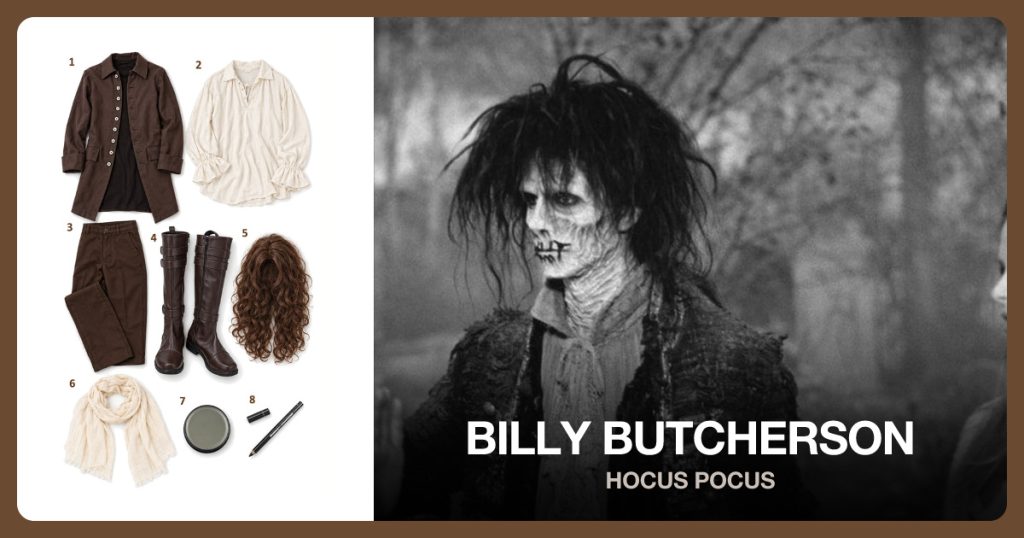
Billy Butcherson
A weathered coat, tangled hair and stitched-mouth makeup bring the Hocus Pocus zombie back to life.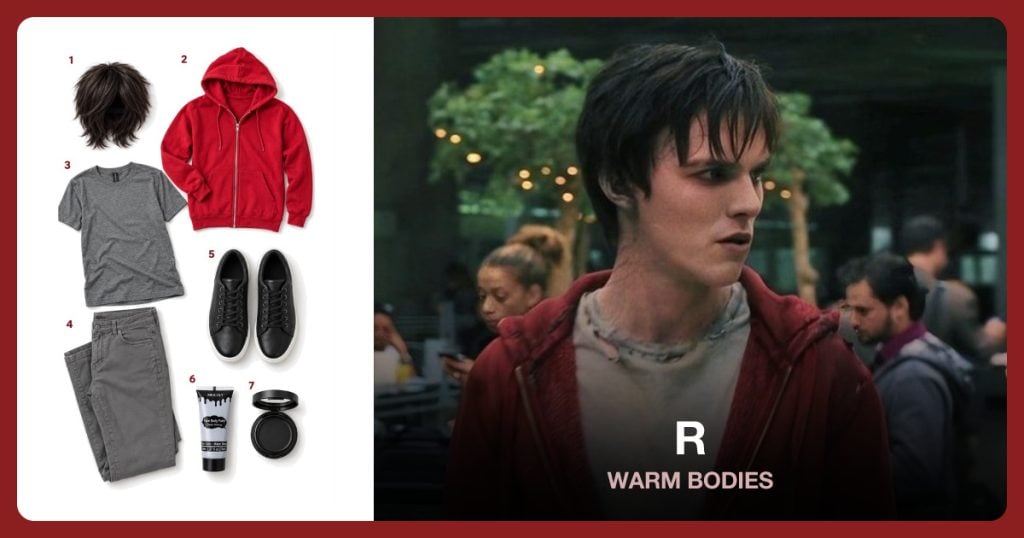
R
A red hoodie and pale makeup make the Warm Bodies zombie an easy outfit to recognize.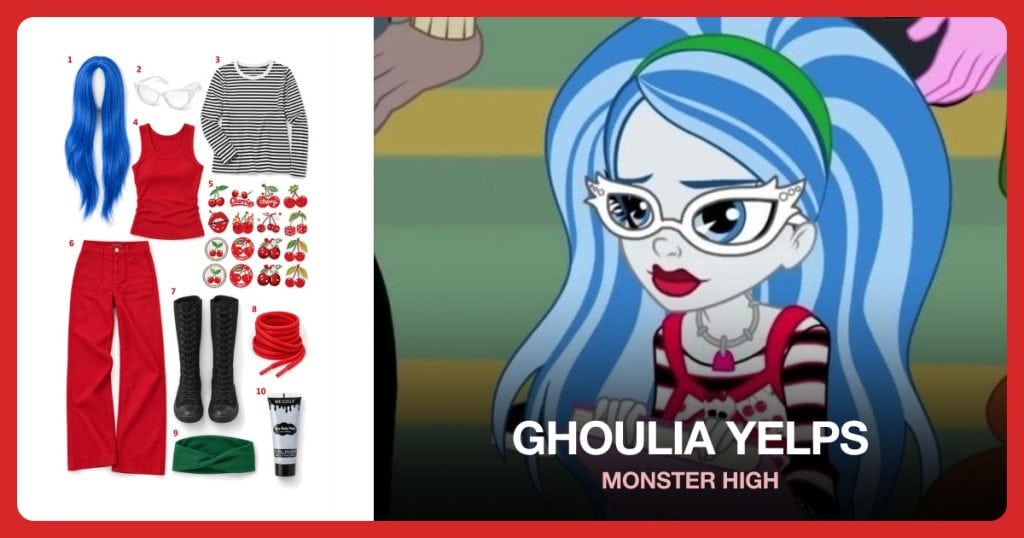
Ghoulia Yelps
Blue hair, white glasses and red-and-black layers create Ghoulia’s classic Monster High look.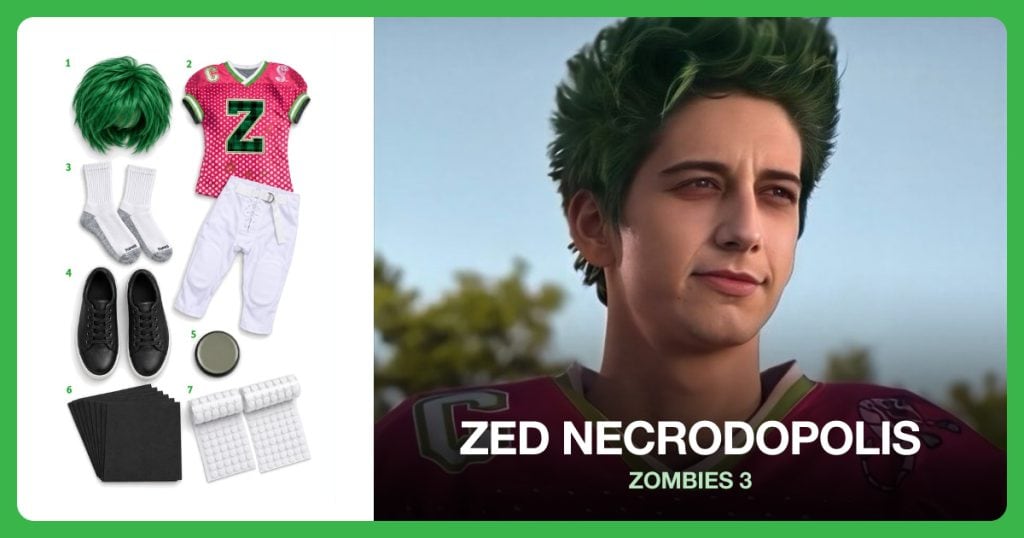
Zed Necrodopolis
Green hair and a pink football uniform turn this ZOMBIES 3 look into a colorful zombie costume.What do you need for a DIY zombie costume?
Start with a top, trousers or a dress, and shoes you already own. Makeup and distressed details create the zombie effect. Fake blood, special contact lenses, weapons and wound prosthetics are not required.
Clothes from home
Choose a faded shirt, a plain tee, jeans and comfortable dark shoes. Use clothes you can permanently alter for the distressed version. For a no-cut outfit, leave the garments intact and add a loose tie, mismatched layers or a crooked name badge.
Makeup to consider
A pale or gray costume makeup palette gives you the main effect. A muted bruise palette is an optional extra for darker shadows; you do not need several overlapping kits. Use cosmetic tools and products intended for the area where you apply them.
For the clothing details
Have fabric scissors, scrap cardboard and a small sponge ready. Brown or charcoal fabric paint is optional for permanent weathering. Work on the clothes off your body, protect the table, and follow the paint’s drying and care instructions.
Decide what stays clean
Keep one comfortable layer underneath, leave pockets usable and keep soles free of paint or fake blood. If you are borrowing clothes, skip all cutting and staining. A recognizable character role and messy styling can do the work instead.
How to make a zombie costume, step by step
The everyday version below uses a gray tee, faded plaid overshirt and dark jeans. Follow the same method with another outfit, or take the no-cut option whenever you want to keep a garment wearable afterward.
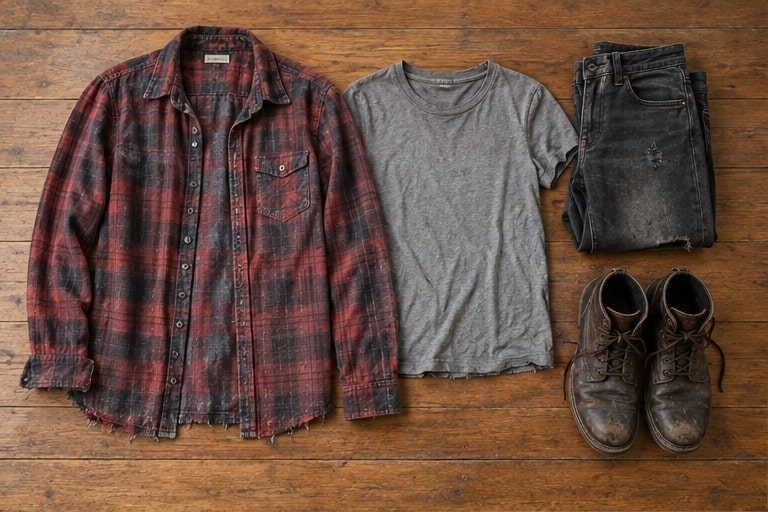
1. Build an outfit before you distress it
Lay out the shirt, base layer, trousers and shoes together. Pick mostly faded colors so one bright new piece does not look unrelated. An open overshirt gives the outfit depth, while the plain tee underneath keeps small tears from exposing more than you intended.
Try everything on before making changes. Sit, bend and reach, then mark a few places where you want wear: the lower hem, one cuff and a trouser pocket edge. Take the clothes off before cutting or painting. Keep the waistband, fastening and main seams intact.
Check: The complete outfit works before any effects are added, and you can move normally in it.
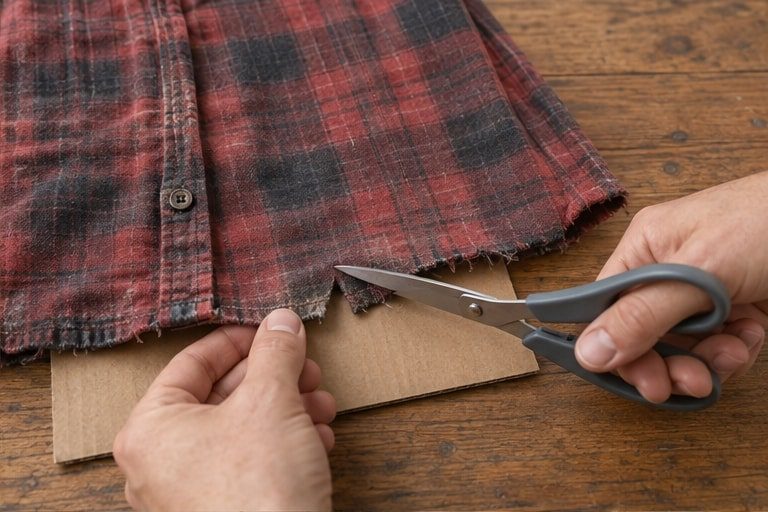
2. Add small, uneven areas of wear
Lay the overshirt flat on a protected surface. Make a few short notches along the bottom hem or cuff with fabric scissors, then gently pull loose threads with your fingers. Start small: you can always remove more fabric, but you cannot put it back.
Vary the spacing instead of cutting a neat row of identical triangles. One worn sleeve and a ragged hem usually tell the story. Avoid cutting across structural seams. For the no-cut version, roll the sleeves unevenly, leave the shirt untucked and use a separate scrap-fabric layer that you can remove afterward.
Check: The edges look irregular, but no long strip can catch around your feet or hands.
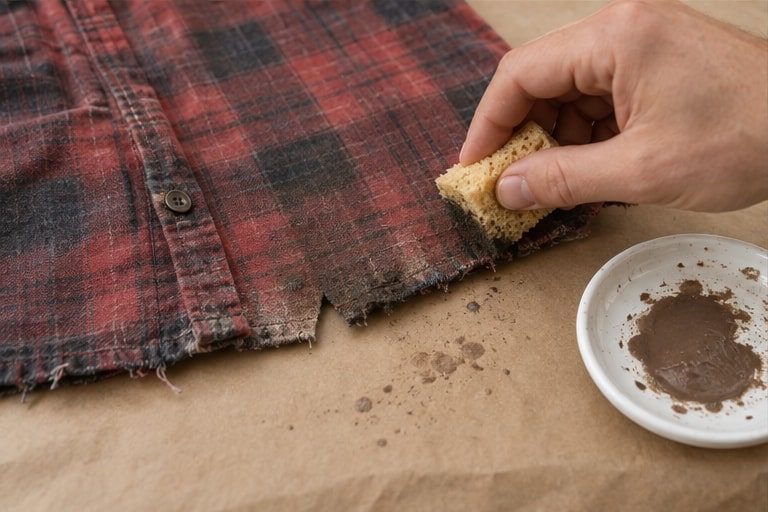
3. Make the fabric look worn, not soaked
Put cardboard inside the shirt so color does not transfer to the back. If you are using fabric paint, test a hidden area first. Load a sponge lightly, dab most of the paint onto scrap material, then stipple a little brown or charcoal around a hem, elbow or pocket.
Leave plenty of the original fabric visible. Concentrated marks at a few edges look more deliberate than coating the entire outfit. Treat this as a permanent alteration unless the product explicitly says otherwise, and let it dry fully according to its directions. There is no need to rub real dirt into clothing.
Check: The garment feels dry, the original colors still show, and your hands do not pick up wet paint when you handle it.
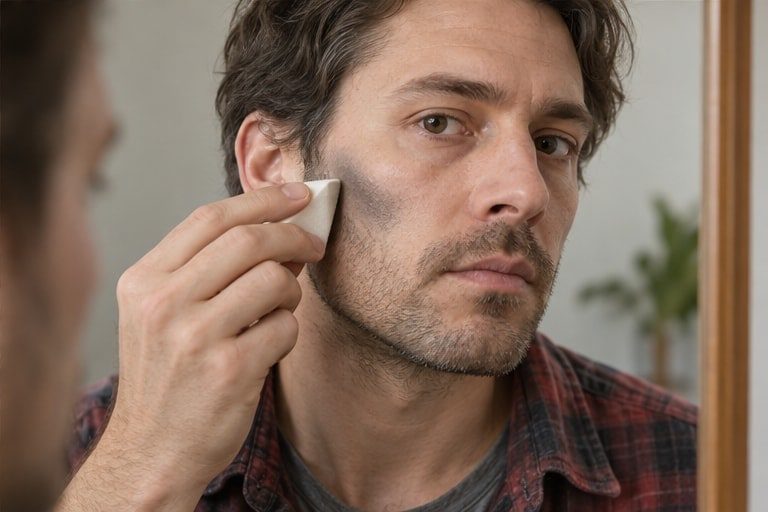
4. Finish with makeup, hair and one clear detail
Use a light hand with gray or muted brown cosmetic shading at the cheek hollows and other areas permitted by the product label. Blend the edges so the color reads as a shadow. You can keep your natural skin tone visible; an opaque white face is not necessary.
Follow each product’s use, patch-test and removal directions. Keep products away from eyes and lips unless they are specifically labeled for those areas. Ruffle your hair with your fingers, then choose one character cue: a loosened office tie, a crooked sash or an open plaid shirt. Any cosmetic fake blood goes on last, sparingly, and only where its label allows.
Check: Your face is recognizable, the makeup edges are blended, and the outfit reads as a zombie even without a prop.
Zombie Costume Hair and Makeup
A tired complexion, uneven shadows and messy hair make the outfit read as undead. Start subtle, then decide whether you want the stronger finish shown in the tutorial.
Work in the right order
Style your hair first, apply the pale base and shadows, then get dressed. Add any wet fake blood last so you do not drag it across your collar. Lay out a towel and keep a mirror nearby; the whole effect is easier to control in thin layers.
Build a pale, uneven base
Blend a small amount of pale or gray cosmetic makeup over the areas you want to emphasize, leaving some natural skin showing. Avoid a solid white mask unless that is deliberately your look. Check the result in ordinary room light before adding more.
Put the shadows where they count
Use muted gray-brown or purple shades at the cheek hollows and temples, then soften the edges. Only use eye-area products near your eyes. Uneven shading looks more convincing than two identical dark circles; start lightly and compare both sides in the mirror.
Give the hair a lived-in finish
Ruffle dry hair with your fingers, separate a few strands and use a little hairspray if you need hold. Keep the shape untidy rather than building a huge nest. Your own hair is enough for this costume, and a loose strand or off-center part can do more than a wig.
Add blood only if you want it
A blood-free zombie still works. For a stronger finish, place a small amount of cosmetic fake blood where its label permits, after dressing. Keep it away from eyes and mouth unless expressly intended for those areas. Test for staining before putting any on clothes you want to keep.
Plan the cleanup before you start
Keep the makeup packaging and use the removal method it recommends. Work gently rather than scrubbing at your skin, and separate stained costume layers from your regular laundry. A little preparation makes the end of the night much easier.
Zombie costume ideas for different wardrobes
The same approach works for men, women and anyone choosing an outfit by comfort rather than a label. Change the clothes and character role; you do not need a completely different makeup kit for each version.
As an Amazon Associate, we earn from qualifying purchases. The kits below are optional starting points; reuse pieces you own and compare garment measurements for a comfortable fit.
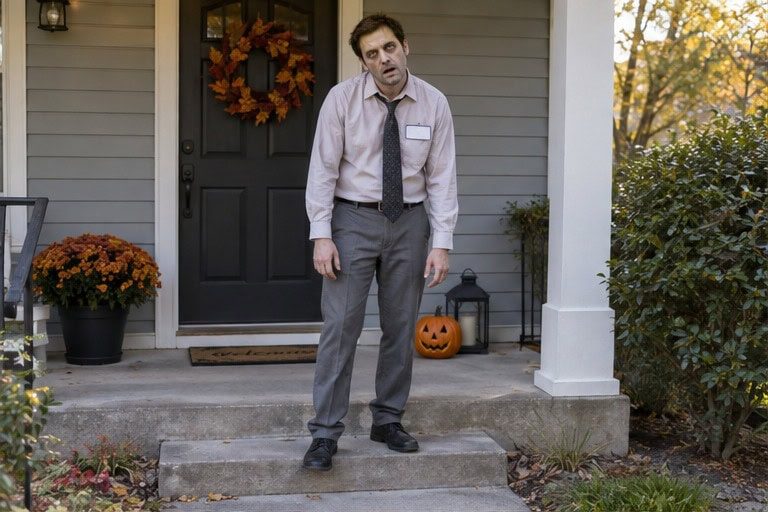
A zombie office worker
Start with a pale button-up shirt, trousers and a loose tie. Roll one sleeve, pull the shirt slightly untucked and add a paper badge with a made-up name. Leave the clothes uncut if they need to go back into your work wardrobe. An empty takeaway cup is an optional joke prop, not an essential purchase.
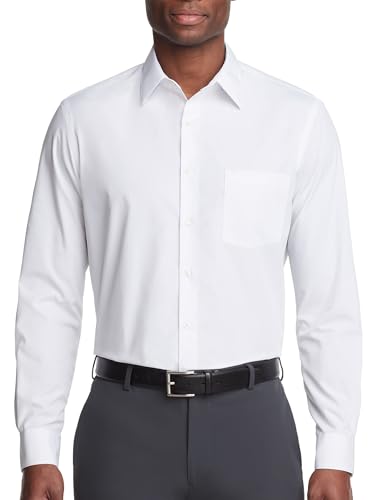 White Button-Down Shirt
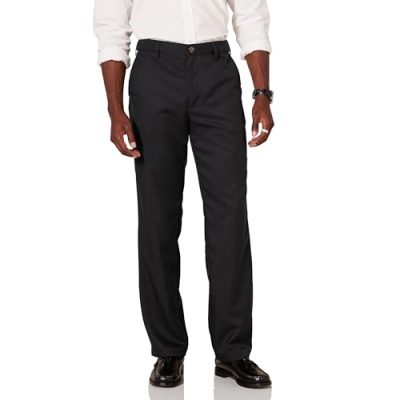 Black Dress Trousers
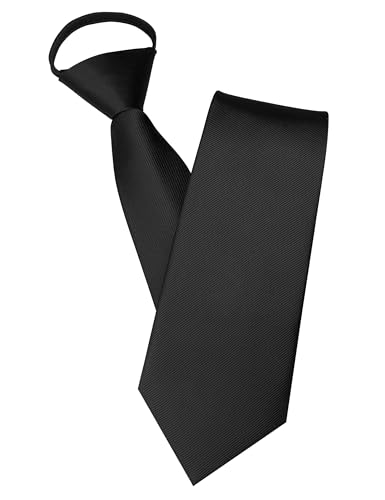 Black Pre-Tied Tie
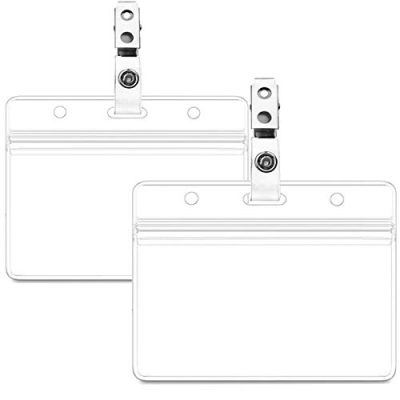 Clip-On Name Badge
A zombie prom guest
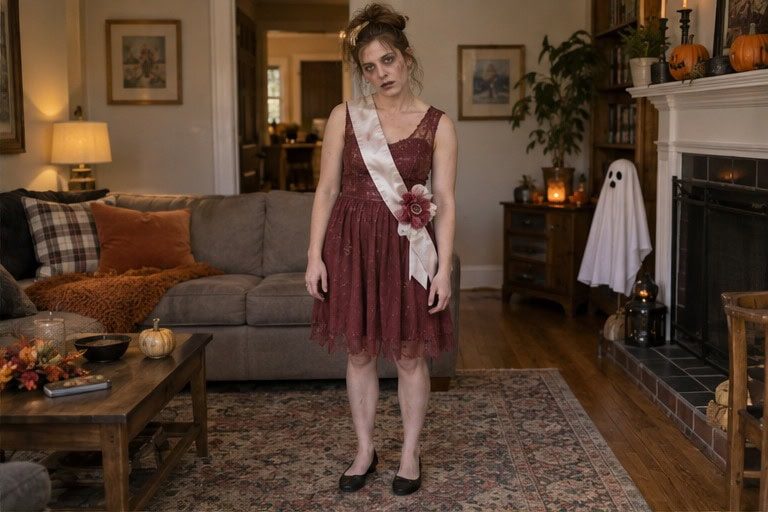
Use an old party dress, suit or jacket that you already have permission to alter. A crooked homemade sash or wilted-looking fabric flower gives the outfit a clear occasion. Keep the hem above your shoes and use comfortable flats or sneakers rather than relying on difficult footwear for the photo.
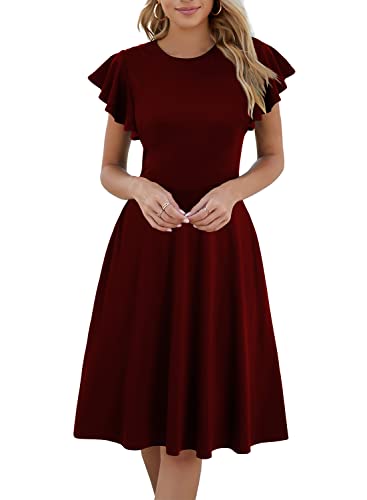 Burgundy Party Dress
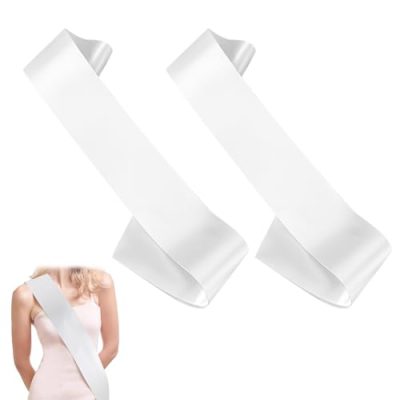 Blank White Sashes (2-Pack)
 Artificial Red Roses (12 Stems)
 Pale Makeup Palette
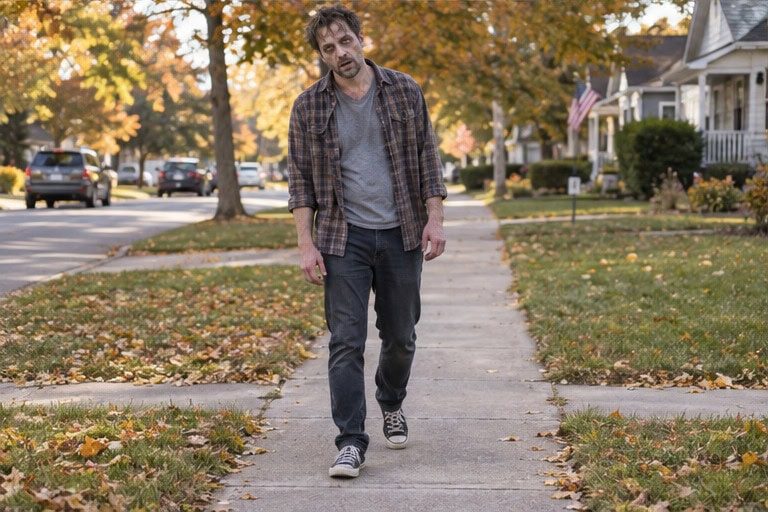
A last-minute zombie
Choose the most rumpled casual layers in your wardrobe, muss your hair and add a little suitable costume makeup. Skip cutting, wet paint and complicated attachments. You can get the idea across with the contrast between an everyday outfit and an unmistakably tired, undead pose.
 Plaid Overshirt
 Gray T-Shirt
 Blue Jeans
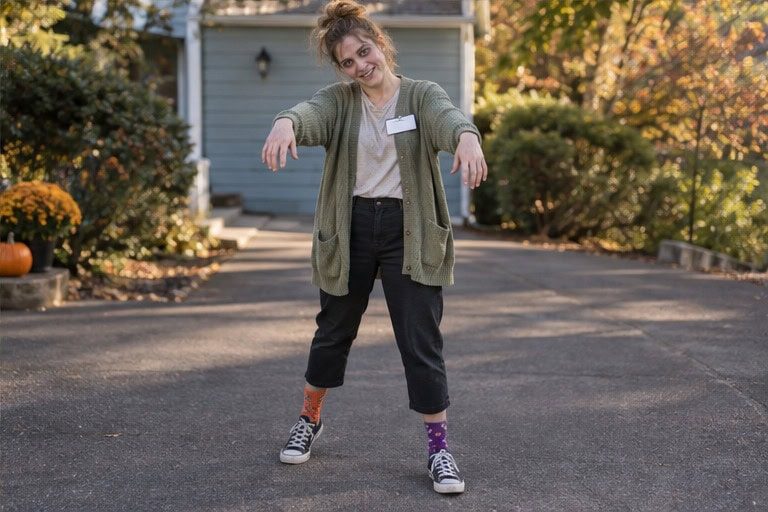
A less-scary version
Use oversized layers, uneven socks and a funny name badge instead of blood or wounds. A loose sweatshirt is an easy alternative to the pictured cardigan; mix two sock colors from the pack below. Keep the face makeup minimal or leave it out. For a child’s costume, have an adult choose age-appropriate products and make alterations; check that loose fabric does not drag or cover the hands.
 Gray Sweatshirt
 Striped Crew Socks (5 Pairs)
Prefer a ready-made zombie costume?
Choose the theme you want, then compare garment measurements with your own for a comfortable fit.
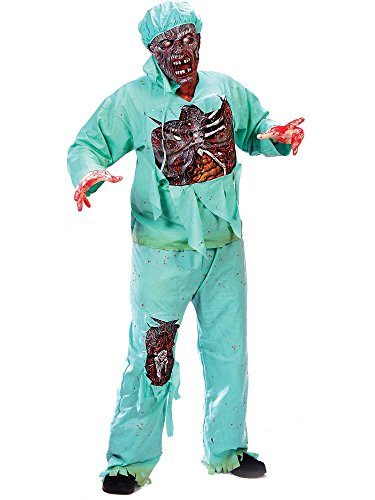
A recognizable role
Zombie Doctor Costume
Distressed medical styling gives the outfit an immediate story. Add your own shoes and makeup.
See on Amazon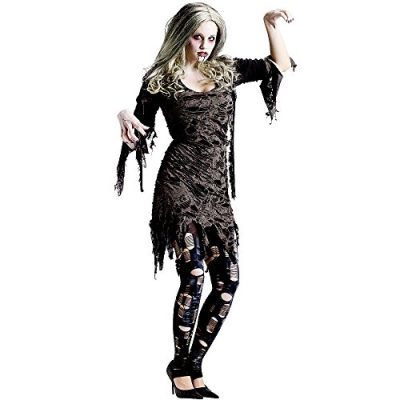
A dress-based option
Living Dead Dress
A ragged black dress is a different starting shape from jeans and a shirt.
See on Amazon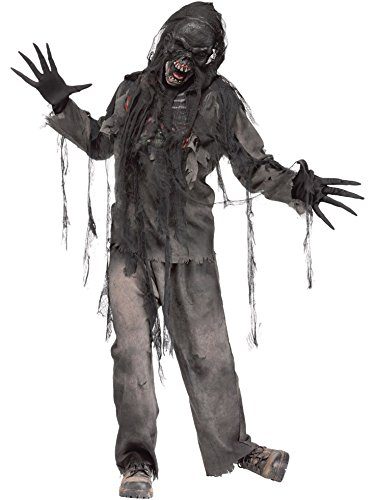
A classic horror look
Burnt Zombie Costume
A distressed outfit with a scorched-looking finish. Use it as the clothing base, then choose your own makeup intensity and footwear.
See on Amazon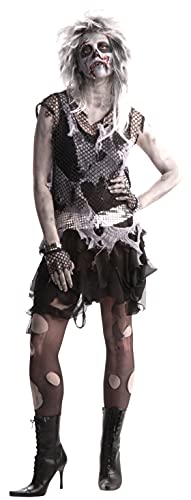
A punk-inspired outfit
Zombie Punk Costume
Tattered black layers give this zombie a punk silhouette. Add your own boots and makeup.
See on AmazonA purchased costume can still be personal: use your own hairstyle and footwear, adjust the layers, and choose a name or role. Avoid cutting a garment until you have checked the fit and decided to keep it.
Quick fixes before you leave
It looks like ordinary messy clothes
Add one clear character detail and make the styling a little more deliberate. A loose tie, crooked sash or open flannel gives the viewer a person to recognize. Then add subtle cosmetic shading, if you want it. More random tearing usually will not solve the problem.
The distressing looks too neat
Stop cutting. Gently pull a few threads around existing notches and leave some edges untouched. Repeated cuts at equal distances look decorative; varied wear on a sleeve, pocket and hem feels less like a pattern.
The makeup looks flat or chalky
Remove a little using the product’s recommended method and blend what remains. Preserve some natural skin texture instead of adding another thick layer. Check the result in daylight as well as bathroom lighting before deciding it needs more color.
The outfit is staining everything
Remove the damp layer and let it dry according to the product instructions. Keep wet effects away from cuffs, seats and items you will carry. If transfer remains a problem, wear the no-blood version; the clothes and face styling can still communicate the costume.
How to Act Like a Zombie
Let the clothes tell who you were; use a delayed reaction and an uneven stance to suggest what happened next.
Drop one shoulder
Relax your arms and let one shoulder sit lower. Keep your gaze slightly unfocused, then turn your head slowly as though you have only just noticed the camera.
React a beat late
Pause before looking toward a sound or reaching for your empty coffee cup. Two small, uneven steps are enough for a photo; walk normally between poses.
Keep an everyday habit
Straighten a crooked tie, check an empty pocket or attempt a tired smile. One familiar action makes your zombie funnier and more personal than holding both arms out.
Turn one zombie into a whole group
Give everyone a different role, then repeat one small detail so the group feels connected. A crooked paper badge, a similar muted makeup treatment or matching fabric sashes can tie together otherwise different wardrobes.
Couples: before and after
One person wears the tidy version of an outfit and the other wears a worn, zombie version. Two office workers are an easy example. Match a shirt color or tie, then take the photo side by side so the contrast does not need an explanation.
Friends: the party never ended
Mix a prom guest, an office worker and an everyday zombie. Each person can use clothes they own. Agree on how scary the group should be first, and avoid making one person buy a full costume just to match everyone else.
Add a recognizable survivor
A friend who prefers a character costume can join as a survivor. These guides build that side of the group; they are not instructions for turning the characters into zombies.
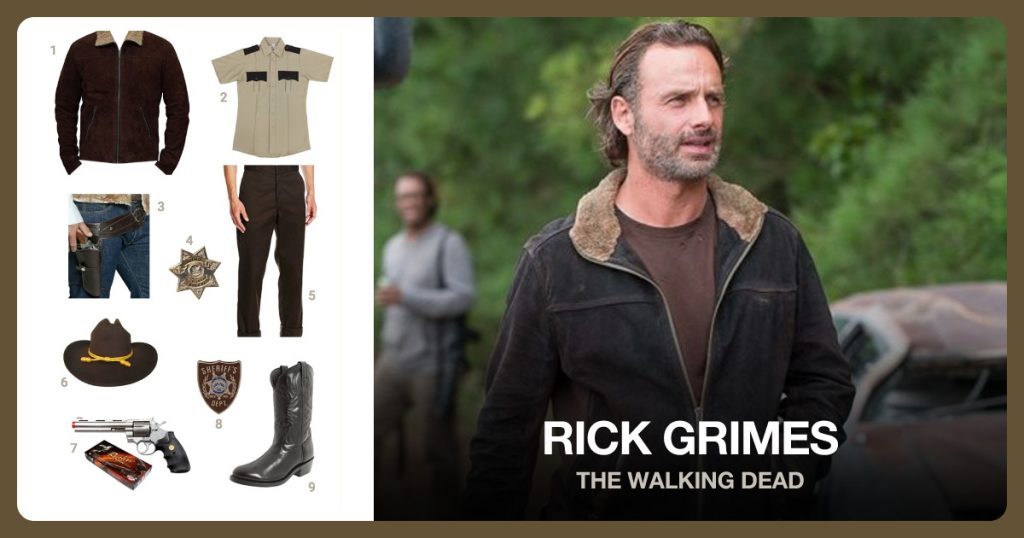
Rick Grimes
A sheriff-inspired survivor adds a clear contrast to a group of everyday zombies.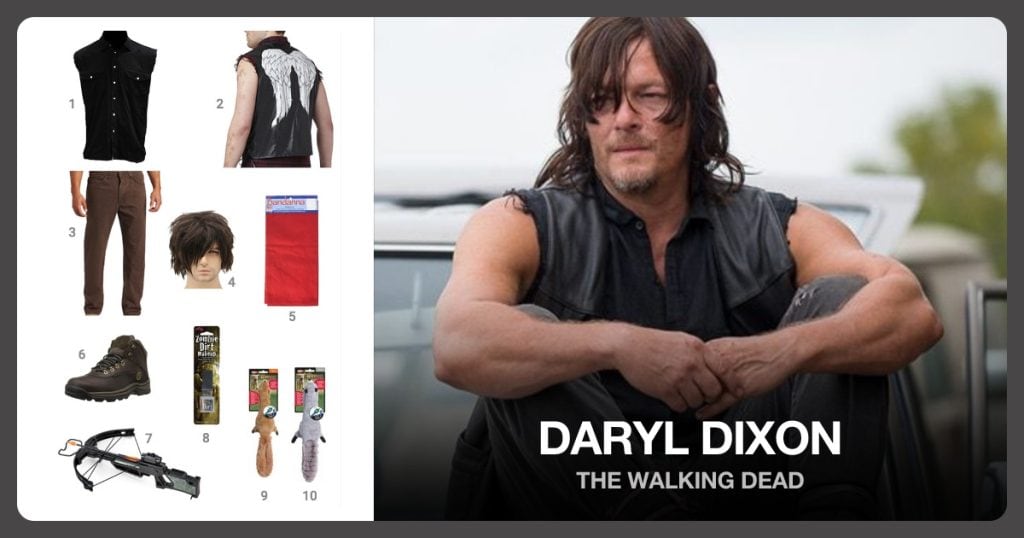
Daryl Dixon
A vest and rugged layers suit a friend who wants a recognizable survivor role.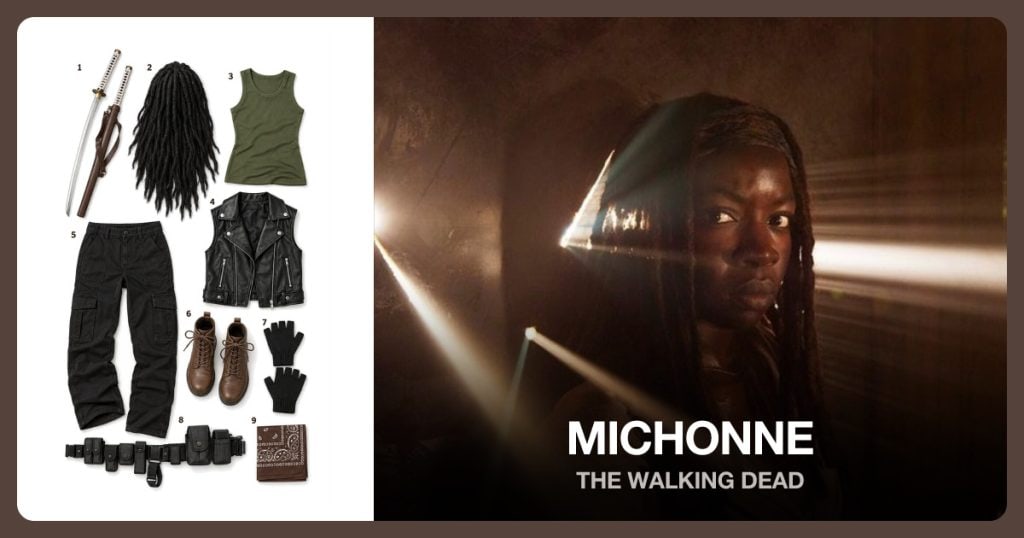
Michonne
Follow the dedicated clothing and hair guide for this Walking Dead character.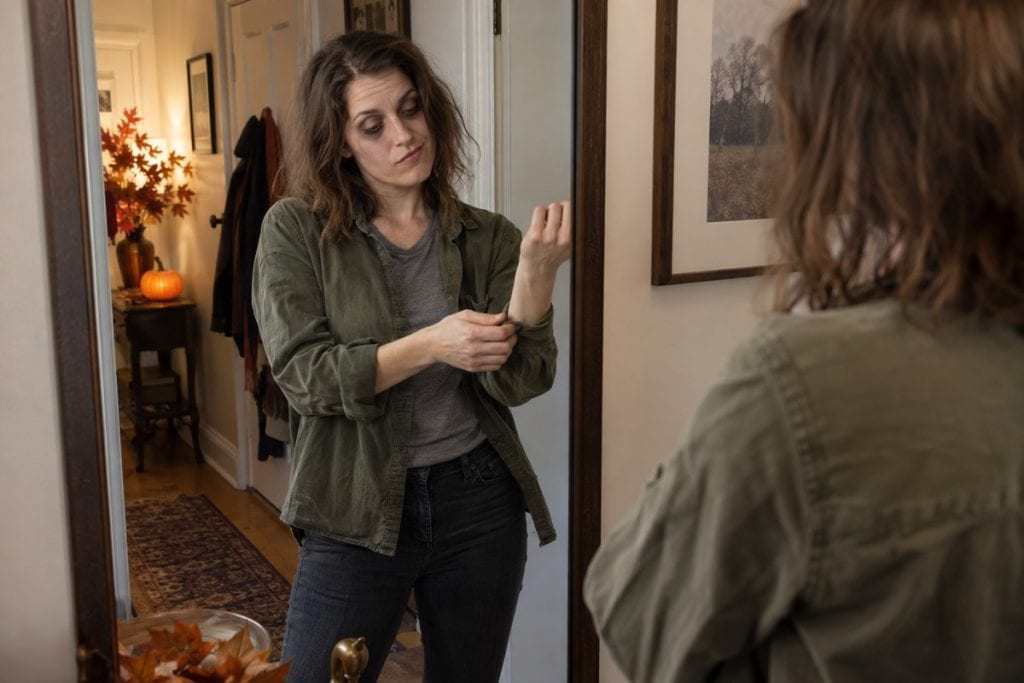
Zombie Costume Tips & FAQs
Practical answers for making, wearing and personalizing your zombie outfit.
What is the easiest way to dress like a zombie?
Wear rumpled everyday clothes, mess up your hair and add subtle gray-brown cosmetic shading where the product permits. An open plaid shirt, jeans and worn shoes make a simple base. Cutting, fake blood and prosthetics are optional.
Can I make a zombie costume without ruining my clothes?
Yes. Leave clothing uncut and unstained. Use uneven rolled sleeves, an untucked shirt, a loose tie and a removable paper badge. If you want frayed fabric, alter a separate scrap layer rather than the garment you plan to wear again. Even “washable” products should be tested on an inconspicuous area first.
Do I need fake blood for a zombie costume?
No. Worn-looking clothes, messy hair and muted makeup can establish the look on their own. Fake blood is an optional effect. If you use it, follow the product’s directions and check whether it is intended for skin, fabric or both.
What shoes work with a zombie costume?
Choose comfortable sneakers, lace-up boots or flats that suit the original outfit. Worn shoes often fit the theme already. Keep the soles clean and leave enough space around the hem to walk normally; there is no need to buy new boots simply to make them look old.
How do I make a zombie costume less scary?
Skip blood, wounds, masks and intense makeup. Use a funny name badge, crooked tie, mismatched layers or a sleepy pose. A recognizable role—like an office worker or prom guest—helps the outfit read even when the effects are gentle.
Should I buy a makeup kit or a complete costume?
Choose makeup if you already have clothes that fit your idea. Choose a ready-made garment if you want a particular shape or theme and do not want to distress clothing yourself. Check the included pieces before buying; many costume photos include styling accessories that are not part of the package.
How can a couple or group coordinate zombie costumes?
Pick a shared setting, such as an office or prom, or give everyone a different role with one repeating detail. Use the same style of paper badge or a similar subtle makeup treatment. Let each person choose clothes and footwear that work for them.
About Zombies
In horror stories, a zombie is a dead person brought back to life—or, in some modern versions, a living person changed by an infection. The rules vary from one story to another. Some shuffle slowly, some move quickly, and others still have enough personality to be funny, romantic or surprisingly ordinary.
Why the clothes tell the story
A zombie usually looks like someone who had a life before everything went wrong. Work clothes suggest an interrupted shift; a party dress suggests a celebration that never ended. Keeping those familiar details makes a homemade costume recognizable before anyone notices the makeup.
Choose your own level of scary
You can borrow the tired expression and uneven layers without copying a film’s elaborate effects. A gentle version works with a crooked tie and messy hair. A darker version uses distressed fabric and stronger shadows. Start with one clear idea so the finished outfit feels intentional.
Make it look like your version of a zombie
Choose the clothes first, add a little wear, then stop and look at the whole outfit. One strong character detail and a few well-placed effects are enough. Whether you go for a sleepy office worker, a prom guest or a classic flannel-and-jeans zombie, keep the version you can actually enjoy wearing.
Back to the step-by-step guide