


















Cardboard Car Costume
DIY Costume Items
Turn a Box into a Car Costume
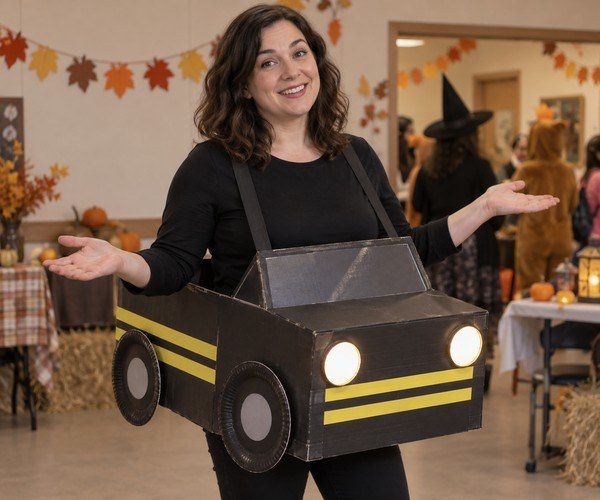
A sturdy, lightweight box becomes a wearable car when you give it a dark body, four round wheels, headlights, and bright trim. This guide uses black acrylic paint for the box, black paper plates for two wheels on each side, warm white battery tap lights at the front, and yellow reflective tape for racing-inspired details. Adjustable webbing straps carry the hollow body over dark everyday clothes, so the wearer can move their arms and keep their head above the car.
Choose a box that sits above the knees and leaves a clear view through its open top. Mark and cut the openings before painting, then finish the decoration and adjust the straps. An adult should handle the utility knife and check every cut edge. For a matching group, pair the car with a Race Car Driver costume or a Mechanic costume.
Prefer a Premade Car Costume?
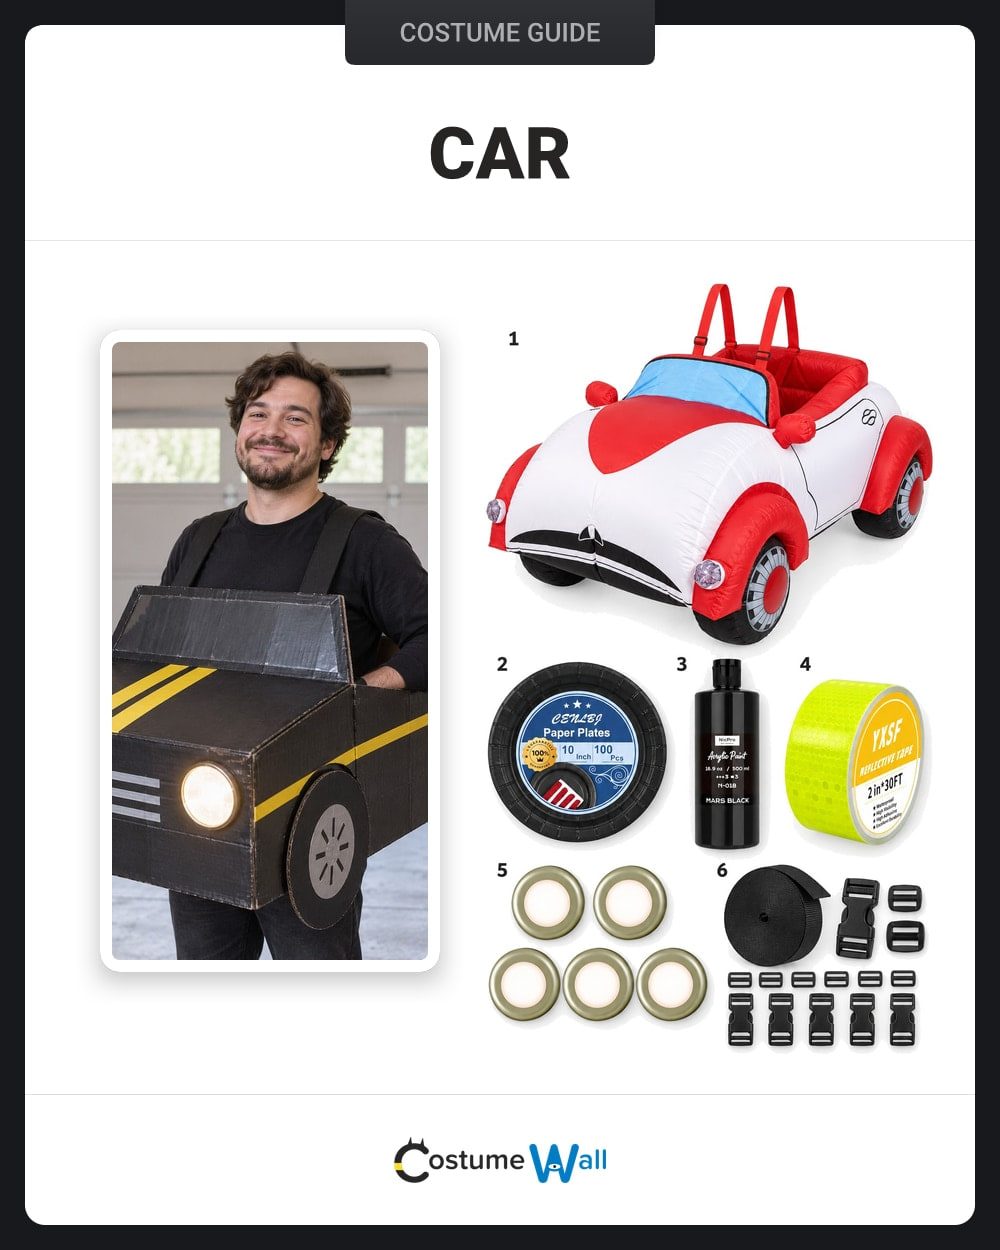
Item 1 in the shopping image is a no-build adult option: the red-and-white inflatable car costume. The set includes the wearable car body and an air blower fan. Wear your own shirt, pants and shoes underneath, and keep the fan running to hold the car’s shape. Check the listing for sizing and the required batteries before ordering. This is a vintage-style car alternative to the black cardboard racer shown here; you can skip the DIY supplies and steps if you choose it.
As an Amazon Associate, we earn from qualifying purchases.
ProjectWearable cardboard car
TechniqueBox construction and adjustable straps
What You’ll Need
Items 2–6 supply the DIY car details and adjustable carrying straps. Choose item 1 instead if you want the premade inflatable costume. Use a clean, lightweight box and basic tools from home for the body.
From the Kit
Use black acrylic paint for the box body, four black paper plates for the wheels, two warm white LED tap lights for the front, yellow reflective tape for stripes, and the black nylon webbing set for two adjustable shoulder straps. The webbing set includes more material than this build needs; cut two matching straps and save the remainder.
From Home
Gather one clean, lightweight cardboard box; a dark shirt and pants; scrap cardboard for inside reinforcement; black duct tape; a ruler and marker; a paintbrush; and scissors. An adult also needs a utility knife and cutting mat for the openings.
Cut and fit before decorating.
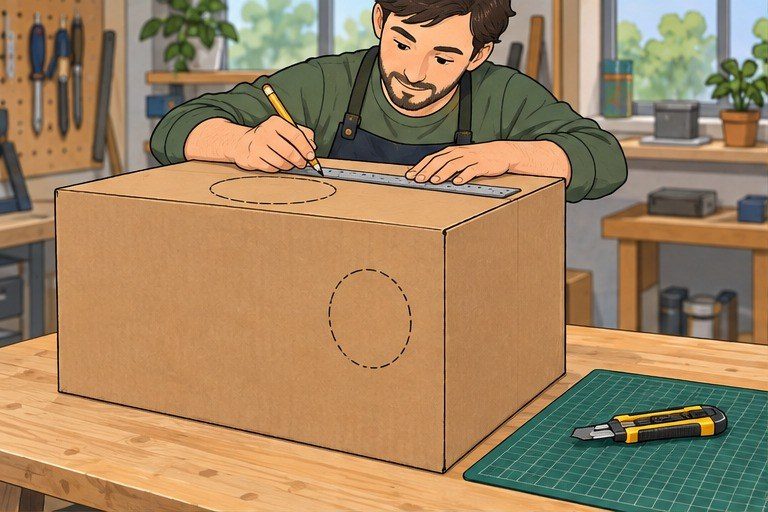
Measure the wearer first, then have an adult cut the top opening and arm holes on a protected surface. Smooth or cover rough edges and try the empty box on before painting.
Let the paint dry before adding lights.
Keep paint out of the openings and allow the cardboard to dry fully. Position the tap lights where their switches remain reachable, and follow the light maker’s battery directions.
Build the Wearable Car
Work through the openings, decoration, and straps in order; checking the fit before the details go on makes adjustments easier.
Measure and cut the box
Wear the dark base clothes and hold the box against the torso. Mark a generous opening at the top for the head and two arm holes high on the sides. Choose a box that ends above the knees; if its bottom flaps would limit walking, remove them while keeping the side walls intact. An adult should cut on a cutting mat, round the openings, and cover rough edges with duct tape. For the raised windshield shown in the photos, fold a short spare-cardboard panel along its bottom edge and tape that flap securely to the front rim. Keep it below chest height and out of your view. Keep the hollow body open enough to see and move freely.
Check: The box rests above the knees, the head and arms clear the openings, and no cut edge feels sharp.
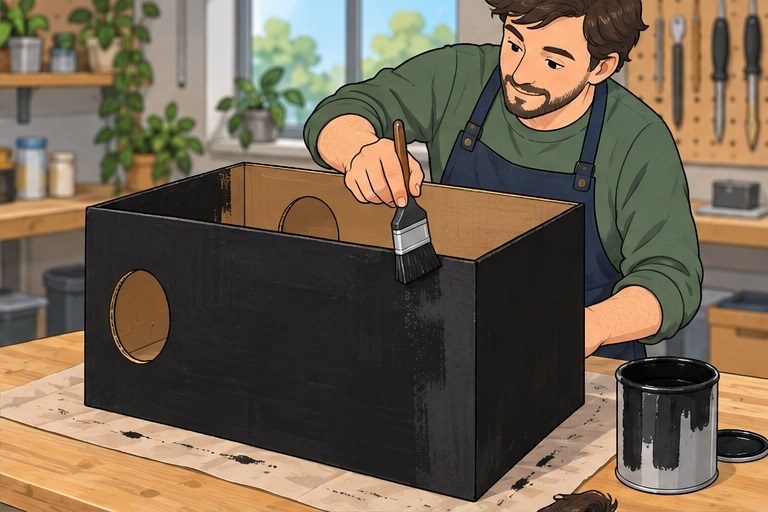
Paint the body black
Set the box on a protected surface and brush black acrylic paint over the outside panels. Leave the open top, arm holes, and bottom edge clear; do not paint the inside where the wearer or straps may rub. Let the coating dry completely before handling the cardboard again. Try the box on once the paint is dry and make sure the added coating has not closed or narrowed an opening.
Check: The outside has an even dark coat, the openings remain clear, and the paint is fully dry to the touch.
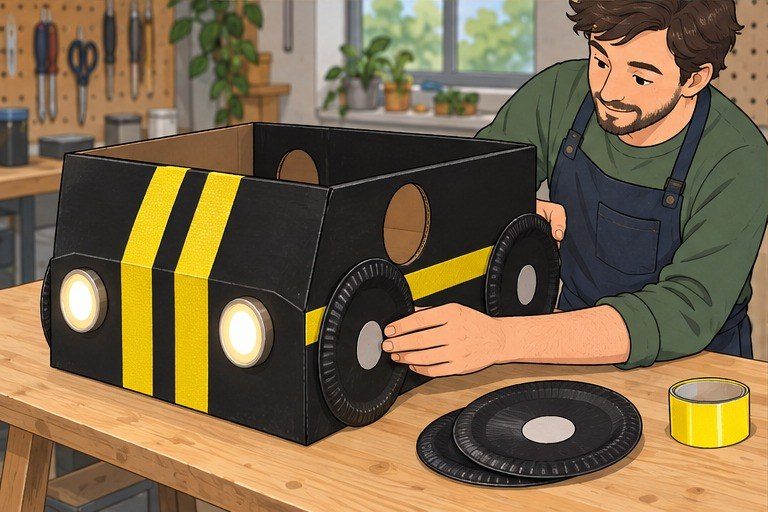
Add wheels, headlights, and trim
Mark matching wheel positions low on both sides and attach two black paper plates per side. Add scrap-cardboard patches inside each wheel location and secure through the box wall with duct tape so the plates have support. Place two warm white tap lights on the front panel with their switches accessible. Finish with yellow reflective tape stripes along the hood or sides. Use small pieces of light-colored scrap paper for optional wheel hubs and thin grille strips, secured with tape; the plain black plates work too. Keep the tape and lights clear of the arm holes and the wearer’s view.
Check: Four plates sit low and evenly on the sides, both front lights switch on, and the yellow trim stays outside the openings.
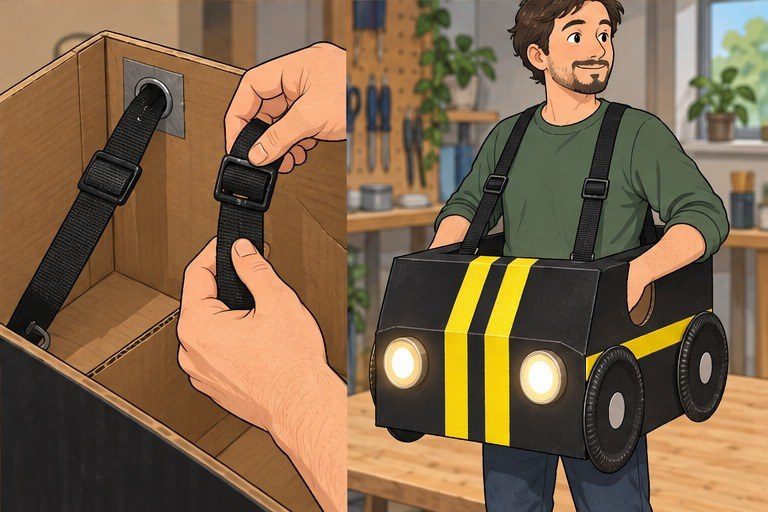
Fit and adjust the straps
Cut two equal lengths of nylon webbing and thread one through each reinforced hole near the upper inside corners. Fold each end back through its buckle or tri-glide hardware and secure it against a broad scrap-cardboard patch with duct tape. Adjust the straps evenly so the box hangs at hip level. With an adult nearby, walk, turn, reach, and look around before finishing; shorten or reposition the straps if the box swings or blocks movement.
Check: The straps hold the car level at hip height, and the wearer can see, turn, reach, and walk without the box catching.
Quick Fixes
- The box tilts forward: Recheck the strap lengths and shorten both evenly. Add a wider scrap-cardboard patch inside any hole that starts to pull through.
- A wheel starts to peel off: Press it back against a dry panel and reinforce the connection from inside with duct tape across the cardboard patch.
- A light will not stay in place: Let the paint dry fully, then move the light to a clean, flat front area with its switch still reachable.
- The costume catches while walking: Shorten the box, remove any bottom flap that reaches the legs, or enlarge the arm openings under adult supervision.
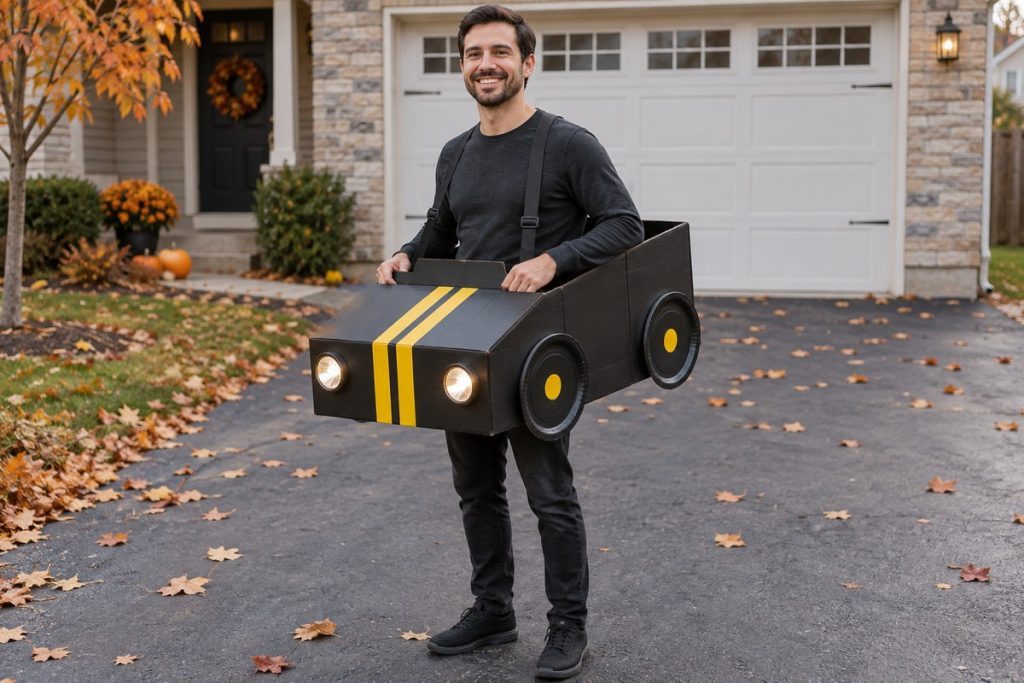
Take It for a Spin
Keep the outfit easy to wear after the build: choose a dark shirt and pants, set the box at hip level, and make sure the straps stay flat over the shoulders. Before heading out, switch on the tap lights and check that the arm holes and open top still give a clear view. A quick side view shows off the plate wheels and reflective trim, while a front view makes the headlights and stripes stand out.
Personalize the car with a different stripe pattern or a simple number panel drawn on spare cardboard. For a group picture, place a driver or mechanic beside the vehicle and leave enough space to see the handmade shape. A plain garage door or fall-colored wall keeps the black box easy to see; frame the wearer with the whole car rather than cropping away its wheels.
Car Costume FAQs
Answers for sizing, straps, wheels, lights, and walking in a cardboard car.
Choose a lightweight box that sits around the torso and ends above the knees. Before decorating, check that the top opening leaves the head and shoulders clear, the arm holes allow a comfortable reach, and the bottom does not catch the legs while walking.
Thread two adjustable webbing straps through reinforced holes near the upper inside corners. Secure the ends against broad cardboard patches with tape, then adjust both sides evenly so the box rests at hip level without pulling on the neck.
Yes. Attach four black paper plates low on the two sides of the box, using two per side. Reinforce the cardboard from inside and fasten each plate through a broad area so the wheels do not peel away from the surface.
Place two battery tap lights on the front where their switches remain reachable, and follow the maker's battery instructions. Keep the head opening, arm holes, and walking space unobstructed; test visibility and movement with an adult nearby before wearing it out.
About Car
A cardboard car costume turns an everyday vehicle into a wearable idea rather than copying one particular character, make, or movie. Its shape is easy to recognize: a hollow body, round wheels, front lights, and bright trim. A light box worn above the knees leaves room for the wearer to look out through the open top and move their arms.
The details can change with the maker. Black paint creates a simple body, paper plates suggest wheels, battery tap lights add headlights, and reflective tape makes bold stripes. Dark clothes let the box stand out, while adjustable straps help carry it without holding it by hand. Choose a different accent color or stripe pattern to make the vehicle your own, and keep every opening clear for movement and visibility.